-
If you haven’t called either or both Alan VanWeele.. 337-304-0379 or David VanWeele.. 386-295-3391…. They have the parts you will most likely need…. And they have lots of knowledge about these motors… call them. Looks like to me that you need to rebuild the carburetor and magneto or get ones that are already rebuilt… call them.Originally posted by ADDvanced View Post
I just looked up on google… search ‘Mercury KG4’….. lots of info there.Leave a comment:
-
Looks like you got some great advice in the YouTube comments.
I can’t believe I’m saying that without sarcasm.Leave a comment:
-
Makes sense, thanks!
Couple update videos:
Rebuilding the Tillotson AJ19 Carb w new gaskets and foam float:

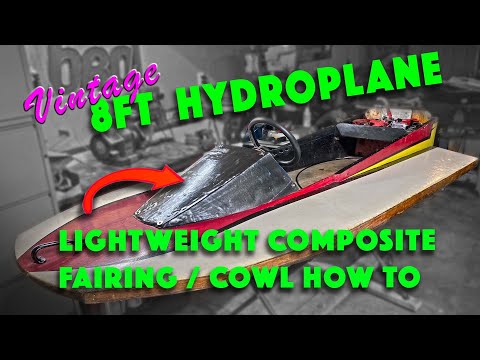
Building a lightweight fairing that fits the actual design of the boat:
First start of my KE7H in 25 years:

Rigging the throttle/steering and dealing with all the parts that didn't fit from portage bay systems:

Leave a comment:
-
The motor will flip up when you back off of the throttle or just slow down… then you don’t have any control.Originally posted by ADDvanced View Post
Leave a comment:
-
Today I decided to just say F it and I remounted the gold cylinder above a bit closer towards the center of the motor, threw the gas tank on her, installed the gearcase, and started rigging the boat.
Throttle cable is done. Steering is almost done, need to run to the hardware store tomorrow morning. Also, I don't have the trim angle pin, I was just going to use some threaded rode with a couple wing nuts.
Before I run her... what is the deal with the rope across the back of the lower unit on a lot of race boats? To keep the engine from flipping up? How would that happen?Leave a comment:
-
Rebuilt carb:
Was then waiting on gearcase, finally picked that up last week, wanted to get on the water a few days ago. Was rigging the hull but all the parts from Portage Bay to hook up the remote throttle were pretty poorly made, nothing fit, center to center of the holes was off, then it was contacting the choke mechanism, then it was hitting the advance/throttle lever, started chewing away at things with my grinder to make stuff fit, needed a few more MM of clearance and wound up cracking my coil mounting plate. Pissed. So it looks like I'm done this year.

Leave a comment:
-
Lot of parts came in the past few days, couple questions for the hive mind:
1. I just filled the gas tank and now I want to rebuild the carb. The fuel shutoff is on the carb. Any tricks here? Or just carefully dump it all back into a container and remove the carb?
2. What style of prop should I be running?Leave a comment:
-
Good show the engine is responding, sounds good.
Have you set the timing for 180 spark balance and piston depth BTDC to fire?
What was the problem with the recoil that is now fixed?
Great trueing on the bottom that should help a lot.
Shame there is a crack in the gear case ;-( , hole to stop crack creep and weld is a good solution to save the case.
From my years testing and racing Mercs with these sensitive QuickiI units I never tightened the outer cone to the the manual value of 100 ft lbs + thread lock to boot, Yikes!. That tight probably aids cracking of these units and ruining threads. The cone needs to be pulled often (I do it after each use) for grease service of the outer needles in the inner cone (I assume your unit has those needle bearings, they made a cone without the needles?). I also change gear lube after each use to keep the Quicki internals alive, it has. Quickies on my past A & 20H engines and Merc 25ss (still have and use) I use 70 ft lbs + NGLI #2 grease with moly on the threads. I still put a sharpie hash line across case and cone for a quick view look to see if it loosened, never has :-) My 1973 Merc 25ss with essentially the same Quicki cone design as yours has the same cone nut, gears, bearings. prop and drive shafts (seals have been replaced) as when bought in 1973 to race in APBA . CCW tighten same as prop rotation also helps keep it there along with well balanced props. For me the 70 ft lbs is more than enough to keep water pump cartridge pressed against the prop ball bearing and compress the O ring to seal and not ruin threads and cause cracks.
With your Quicki to be welded I would be careful with excessive cone tighten especially if the new cone fits well in the old case threads.
Also when you are ready to run there is no need to excessively tighten the prop nut to secure the prop. The shear pin is in double shear and excessive tightening can easily start the pin shearing process to failure. I use a nylock 1/2 x 13 tpi nut with a fender washer as a backer on the prop and good hand snug tight with 7" x 3/8 drive wrench and glove to hold the prop. The nylock holds well and has never loosened for me.
Keep us up dated.Leave a comment:
-
Good show the engine is responding, sounds good.
Have you set the timing?
What was the problem with the recoil that is now fixed?�
Great trueing on the bottom that should help a lot.��
Shame there is a crack in the gear case, hole to stop crack creep and weld is a good solution to save the case.
From my years testing and racing Mercs with these sensitive QuickiI units I never tightened the outer cone like the manual states at 100 ft lbs + thread lock to boot, Yikes!. That tight probably aids cracking of these units and ruining threads. The cone needs to be pulled often (I do it after each use)� for grease service of the outer needles in the inner cone ( I assume your unit has those needle bearings?). I also change gear lube after each use to keep the Quicki internals alive, it has. Quickies on my A & 20H engines of the past and Merc 25ss (still have and use) I use 70 ft lbs + NGLI #2 grease with moly on the threads. I still put a sharpie hash line across case and cone for a quick view look to see if it loosened, never has :-)� My 1973 Merc 25ss with essentially the same Quicki cone design as yours has the same cone nut, gears, bearings. prop and drive shafts (seals have been replaced)� as when bought in 1973 to race in APBA 70 ft lbs + grease noted. CCW tighten same as prop rotation also helps keep it there as well as balanced props. 70 more than enough to keep water pump cartridge pressed against the prop ball bearing and compress the O ring to seal and not bust ruin threads and cause cracks.� �
With your Quicki to be welded I would be careful with excessive cone tighten especially if the new cone fits well in the old case threads.�� ���
Also when you are ready to run there is no need to excessively tighten the prop nut to hold the prop. The shear pin is in double shear and excessive tightening can start the shearing process. I use a nylock 1/2 x 13 tpi nut with a fender washer as a backer and good snug tight. The nylock holds well has never loosened for me.
Keep us up dated.


Leave a comment: